

I knew it was the perfect pattern for this piece of fabric and I saw the yardage needed, I knew at once it was kismet. It didn't hurt that there were princess seams to boot I might add. I made View A.

In trying to give my jacket a more finished look, I tried to pay attention to the fine details. Since I wasn't using a lining due to the fur lining, there was a seams everywhere.

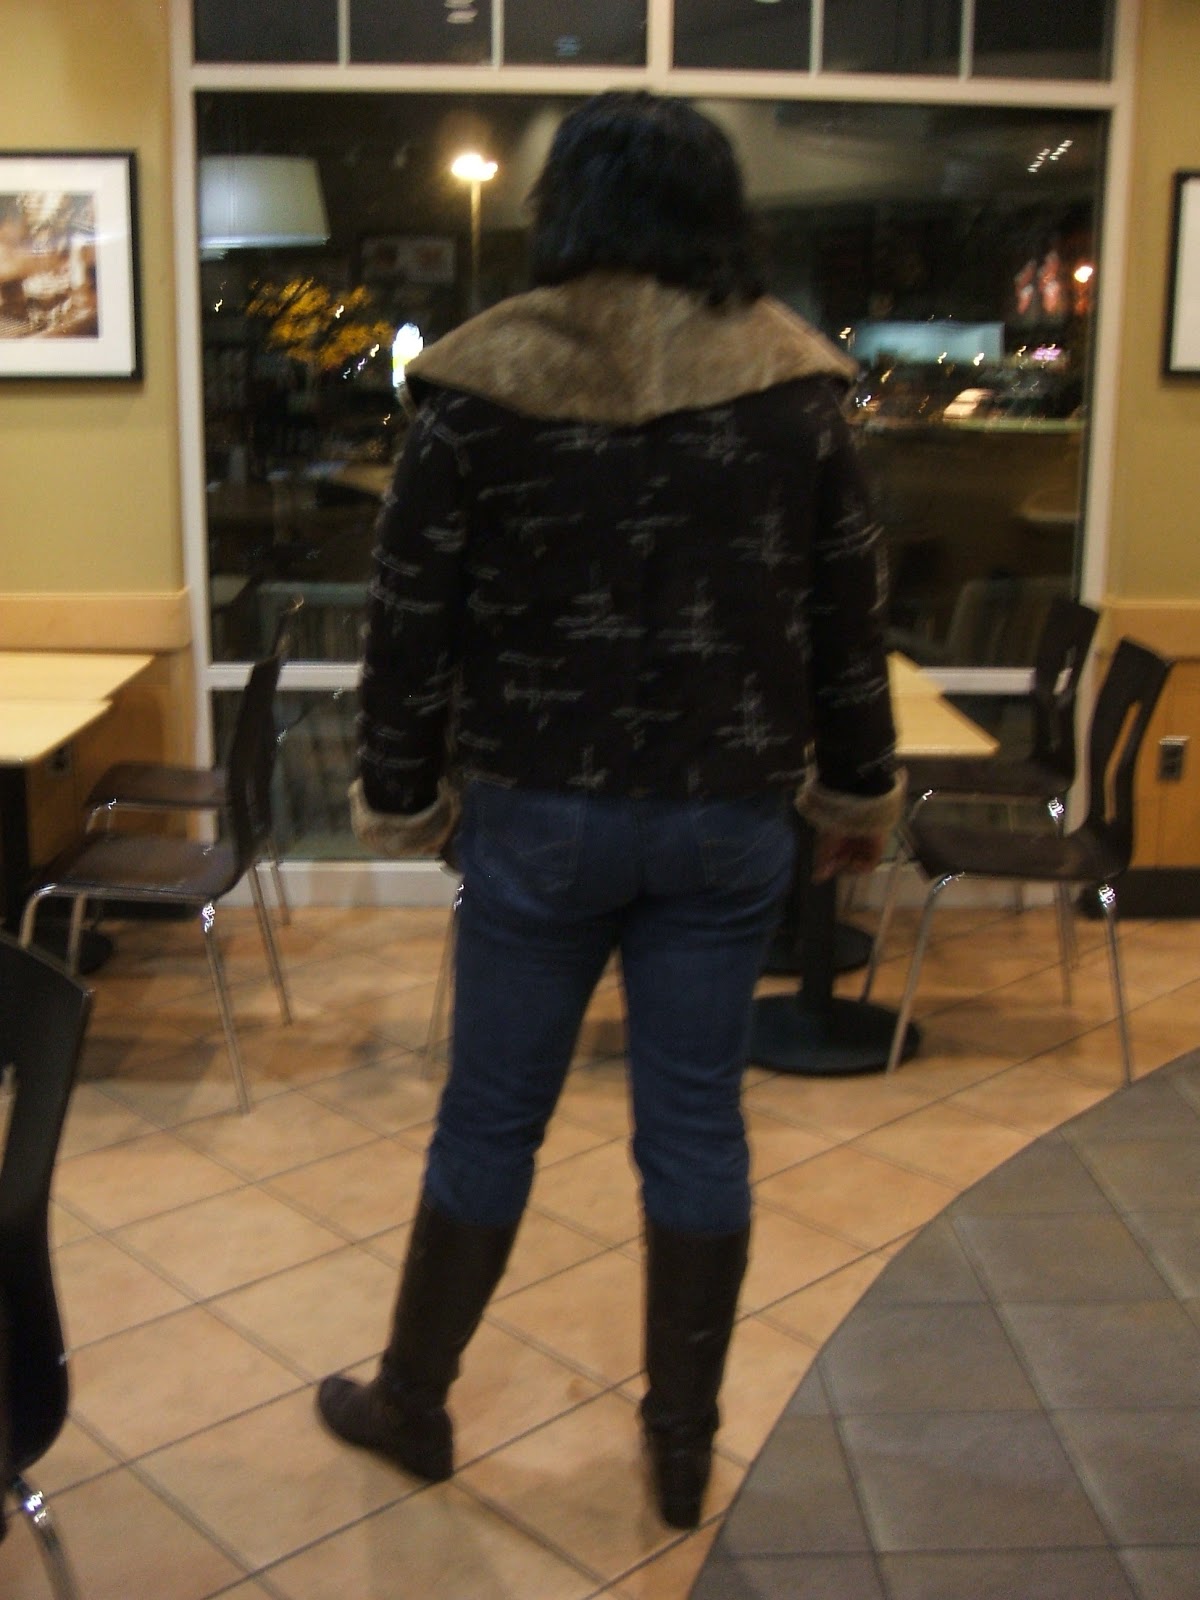
I didn't not mine that inside the coat because of course, no one sees that and it's fine in a faux shearling, but this jacket has a shawl collar and in putting the collar together, there is a seam straight down the middle of it. I was not liking that at all. I toyed with sewing an extra strip of fabric on as a design element or putting a leather strip on then just by chance as Lola was modeling the jacket for me I happened to just fold the seam over and it laid pretty flat so I opted to just sew it down making the seam less noticeable. I drawn a circle on the next picture to show you where the actual seam is.

Here is the same picture again without the circle.

And now a full view of the back.

The pattern calls for you to sew 2 inch pieces of elastic on the jacket to loop over buttons as closures. I was not keen with that idea so I placed a toggle button closure with leather strips on the front of the jacket.

Right now I only have one closure on and I'm still deciding where I want to place the other one or even if I need it at all.
I also rounded the bottom edge of the jacket instead of leaving it square as the pattern dictates. I thought it looked a little nicer that way.
I wore my jacket to work yesterday and got quite a few compliments. My knitting buddies saw it Thursday night and thought I had purchased the jacket, then they proceeded to tell me that I made them sick.

I smiled and stated I'd be more than willing to teach them but they are of the mindset right now that one craft is enough. By the way there is enough shearling leftover to make a coat for Jack. When it done I'll take pictures so you can see him in it. I had him running around in it last night for a fitting. He looked like a little doggie pimp. All the lady dogs in the neighborhood do love him. The collar on the coat reminds me of Little Lord Fauntleroy.

I can't wait until it's finished.
As promised, Linda and Adelaide here is the chicken pot pie recipe I promised. The original recipe is on Cooking.com here.
Chicken Pot Pie


For the Filling:
2 1/2 cups chicken stock
2 skinless, boneless whole chicken breast, about 1 1/2 lb total
cut into strips
Salt
Pepper
1 to 2 sprigs of fresh thyme
3 tablespoons of fresh chives
3 tablespoons of chopped parsley(I use the Italian one)
2 ½ cups of carrots (about 3 or 4 carrots cut about an inch
thick)
3 celery stalks cut about an inch to an inch and half thick
10 oz pearl onions, peeled (I cut each onion into 4 pieces
1 cup of peas
3/4 cup of corn
½ cup of frozen mixed veggies (optional but I like it.)
6 tablespoons of unsalted butter
7 tablespoons of flour
1 cup of milk ( I use 1% but whatever you have in the fridge
will be fine)
1 egg lightly beaten to use for coloring (place to the
side. This will be used at the end.
For the Crust, you can make your own or be like me and just
buy pie crust from the store.
In a saucepan over medium heat, bring the stock to a simmer.
Add the chicken and simmer, uncovered, until opaque throughout, 15-20 minutes.
Remove from the heat and let the chicken cool in the liquid. Remove the chicken,
and place the stock to the side to be used later. You should have about 2 1/2
cups stock. Set aside.
Bring a saucepan three-fourths full of water to a boil and
salt lightly. Add the carrots and cook over medium-high heat for 5-6 minutes.
Add the celery, pearl onions and peas, corn and mixed veggies and cook until
all are barely tender, about 3 minutes longer. Drain well; set aside.
In a saucepan over medium heat, melt the butter. Sprinkle in
the flour and whisk until the mixture is gently bubbling and smooth, 2-3
minutes; do not brown. Gradually add the reserved stock, whisking constantly,
and bring to a simmer. Cook, stirring often, until smooth and slightly
thickened, 4-5 minutes. Add the milk and cook, stirring occasionally, until the
sauce coats the back of the spoon, about 5 minutes. Remove from the heat and
stir in the salt and pepper to taste, the thyme, chives and parsley.
Preheat the oven to 400 degrees F. Add the chicken and
vegetables to the sauce and stir to combine. Spoon into a 9-by-13-inch baking
dish. Brush the edge of the dish with some of the beaten egg.
Unroll your pie dough and place it on the top of your baking
dish covering the pie mixture. Make sure
to press the edges firmly so that the mixture does not bubble out. Trim away the overhang. and use the scraps to
decorate the top if you wish. Brush the
top with the rest of the beaten egg mixture and cut three slits into the center
of the pie.
Bake until golden brown, about 25-30 minutes. Remove from the oven and let sit for about 5
minutes then spoon into bowls.
The first time I had this I liked it a lot but wished there
was more pastry so the next time I’m going to try it with pastry on the bottom
of the baking dish as well as on the top.
Have an awesome weekend!!!
16 comments:
Nice Jacket!!
So, "I don't do (mending/custom sewing/hemming/etc.), but I can teach you" gets the same results everywhere, huh?
Yes it does.
What a great jacket! (Also, thanks for the recipe! Guess what I'll be making soon.)
I hope you enjoy it. I'm going to make another one this weekend.
Great looking coat and it looks snugly warm.
I'm with the rest of your knitting buddies ... LOLOLOL!!!
Wonderful work on that jacket lady!!! You look awesome in it.
This coat is wonderful! You and Sheila are giving me "life" with these coats lol...
Really cute jacket!
That is a great looking jacket.
Andrea your jacket is BEAUTIFUL! Thanks for the recipe too!
P.S. So glad you and yours are safe!
So happy to hear that all is well with you and yours. That jacket is killer, you rocked it.
Great jacket! Very on-trend and looks warm to boot.
WOW that's some nice jacket you got there! The seam is not bad at all, the nap will cover it when brushed just right!
Thanks for the nice comment on my blog!
Lady, you look terrific in your new jacket. I've been sewing up a storm. I'm glad you are able to have more time for yourself.
Oops! I forgot to say the pot pie looks delicious. Thanks for the recipe.
Post a Comment